This component has been created for LightwaveRF Lights. The reasoning behind it is simple, I have them throughout the house and was sick of using CMD line switches. It uses RabbitMQ to que the messages also to ensure it never misses a command.
Please follow the install guide below and let me know what you think! It is not the prettiest component but dam does it work well! It also assumes that you have setup Home Assistant using Hassbian.
If you have not setup Home Assitant yet please follow my video guide Here.
- First you have to pair you pi to the wifi link.
- SSH to the to your raspberry pi and copy the line below, then add the IP address of your LightwaveRF Wifi Link.
- NOTE for Synlogy you have to install synogear to get access to netcat [sudo synogear install]
$ echo -ne "100,\!F*p." | ncat -u -w1 [IP.OF.YOUR.WIFILINK] 9760- Now hit enter.
- The wifi link should flash, click the button on the link and you are now paired.
- Enter the code below to create the folder to download needed pkgs for RabbitMQ. The queuing system behind this awsome component.
$ cd /home/pi
$ sudo mkdir rabbitmq
$ cd rabbitmq$ sudo wget https://packages.erlang-solutions.com/erlang-solutions_1.0_all.deb
$ sudo dpkg -i erlang-solutions_1.0_all.deb-
When prompted delete 'squeeze' and type 'stretch' then hit enter.
-
Update repo info
$ sudo apt-get update- Continue install of pre reqs, for the most recent version goto https://packages.erlang-solutions.com/erlang/#tabs-debian
$ wget http://packages.erlang-solutions.com/site/esl/esl-erlang/FLAVOUR_1_general/esl-erlang_20.1.7-1~raspbian~stretch_armhf.deb
$ sudo dpkg -i esl-erlang_20.1.7-1~raspbian~stretch_armhf.deb
$ sudo apt-get -f install -y
$ sudo apt-get install logrotate -y
$ sudo apt-get install socat
$ sudo apt-get install python-pip -y- Install service and component dependecies. (For some reason it is not auto installing Pika in the Virtual Env of Hassbian so we have to do it manually for now).
$ sudo pip install pika
$ sudo -u homeassistant -H -s
$ source /srv/homeassistant/bin/activate
$ pip3 install pika
$ exit
$ sudo reboot- Install any missing dependencies
$ sudo apt-get -f install-
To find the most up to date release of RabbitMQ goto: https://github.com/rabbitmq/rabbitmq-server/releases
-
you are looking for the file ending with 'all.deb'. Below will download 3.7.5.
$ sudo wget https://github.com/rabbitmq/rabbitmq-server/releases/download/v3.7.5-rc.1/rabbitmq-server_3.7.5.rc.1-1_all.deb
$ sudo dpkg -i rabbitmq-server_3.7.5.rc.1-1_all.deb- Install any missing dependencies
$ sudo apt-get -f install- Configure RabbitMQ permissions and accounts. I tend to use the pi account for this.
$ sudo rabbitmq-plugins enable rabbitmq_management
$ sudo rabbitmqctl add_user [youruser] [yourpassword]
$ sudo rabbitmqctl set_user_tags [youruser] administrator
$ sudo rabbitmqctl set_permissions -p / [youruser] ".*" ".*" ".*"- Open a web browser and access rabbit mq gui.
[IPOFYOURPI]:15672-
Now login with credentials just created
-
Now click exchanges then at the bottom click 'Add a new exchange'
-
Only modify below to match.
name: LightwaveRF
Type: Direct- Now click "Add exchange".
- Now click Queues and at the bottom click 'Add a new queue'
- Only modify below to match.
name: LightwaveRF
Drability: Durable- Click "Add queue".
- RabbitMQ is now setup ready to be used.
- We now need to install a python script as a service to grab qued messages and fire the commands at the Wifi Link.
$ cd /home/pi
$ mkdir services
$ cd services
$ wget https://raw.githubusercontent.com/SCCMOG/Home-Assistant/master/LightwaveRF%20Light%20Custom%20Component/services/LightwaveRF_service.py
$ sudo nano LightwaveRF_service.py-
Now change username and password to previously configured for RabbitMQ.
-
Now press 'ctrl + x' followed by 'y' to save the file.
-
Configure the service.
$ sudo nano /lib/systemd/system/lightwaverf.service- Copy and paste below (right click in terminal window to paste)
[Unit]
Description=Recieves LightwaveRF Commands from Rabbit MQ
After=multi-user.target

[Service]
Type=simple
ExecStart=/usr/bin/python /home/pi/services/LightwaveRF_service.py
Restart=always
RestartSec=3

[Install]
WantedBy=multi-user.target- now hit 'ctrl+x' followed by 'y' and then enter to save the new service.
- Final configuration for service.
$ sudo chmod 644 /lib/systemd/system/lightwaverf.service
$ chmod +x /home/pi/services/LightwaveRF_service.py
$ sudo systemctl daemon-reload
$ sudo systemctl enable lightwaverf.service
$ sudo systemctl start lightwaverf.service- Now to check the service is up and running
$ sudo systemctl status lightwaverf.service- If you see running in then happy days! If not you can always run the script manually by running it will output to the terminal:
$ python LightwaveRF_Service.py- Firstly we need to download the file to the correct directory (assuming you are running hassbian).
$ cd /home/homeassistant/.homeassistant/
$ sudo mkdir custom_components
$ cd custom_components
$ sudo mkdir light
$ cd light
$ sudo wget https://raw.githubusercontent.com/SCCMOG/Home-Assistant/master/LightwaveRF%20Light%20Custom%20Component/light/lightwaverf_light.py-
Now we have the Component we need to edit the Configuration.yaml (or light.yaml if you use it).
-
The room number and device number can be found on the web application by viewing the source of the room.
-
If you only have a couple of lights then try just adding R1D1 first.
-
R stands for Room
-
D stands for device.
-
Name is what you would like them called.
-
These lights are fully dimmable and group turning on and off is fully supported.
-
Dimming though alexa and google home also works.
light:
  - platform: lightwaverf_light
    rabbithost: localhost
    rabbitport: 5672
    rabbitque: LightwaveRF
    rabbituname: [yourusernameforrabbitmq]
    rabbitpass: [yourpasswordforthatuser]
    lights:
      - id: R1D1
        name: Lounge One
      - id: R1D2
        name: Lounge Two
      - id: R2D1
        name: Office Light
      - id: R3D1
        name: Bathroom Spot Lights
      - id: R3D2
        name: Bathroom Extractor
      - id: R4D1
        name: Bedroom Main Light
      - id: R4D2
        name: Bedroom Mirror Lights
      - id: R5D1
        name: Hall Light
      - id: R6D1
        name: Porch Light
      - id: R7D1
        name: Landing Lights
      - id: R8D1
        name: Attic Light
      - id: R9D1
        name: Fridge Lights
      - id: R9D2
        name: Dining Lights
      - id: R10D1
name: Kitchen Spot Lights- Finally save your config and reboot home assistant
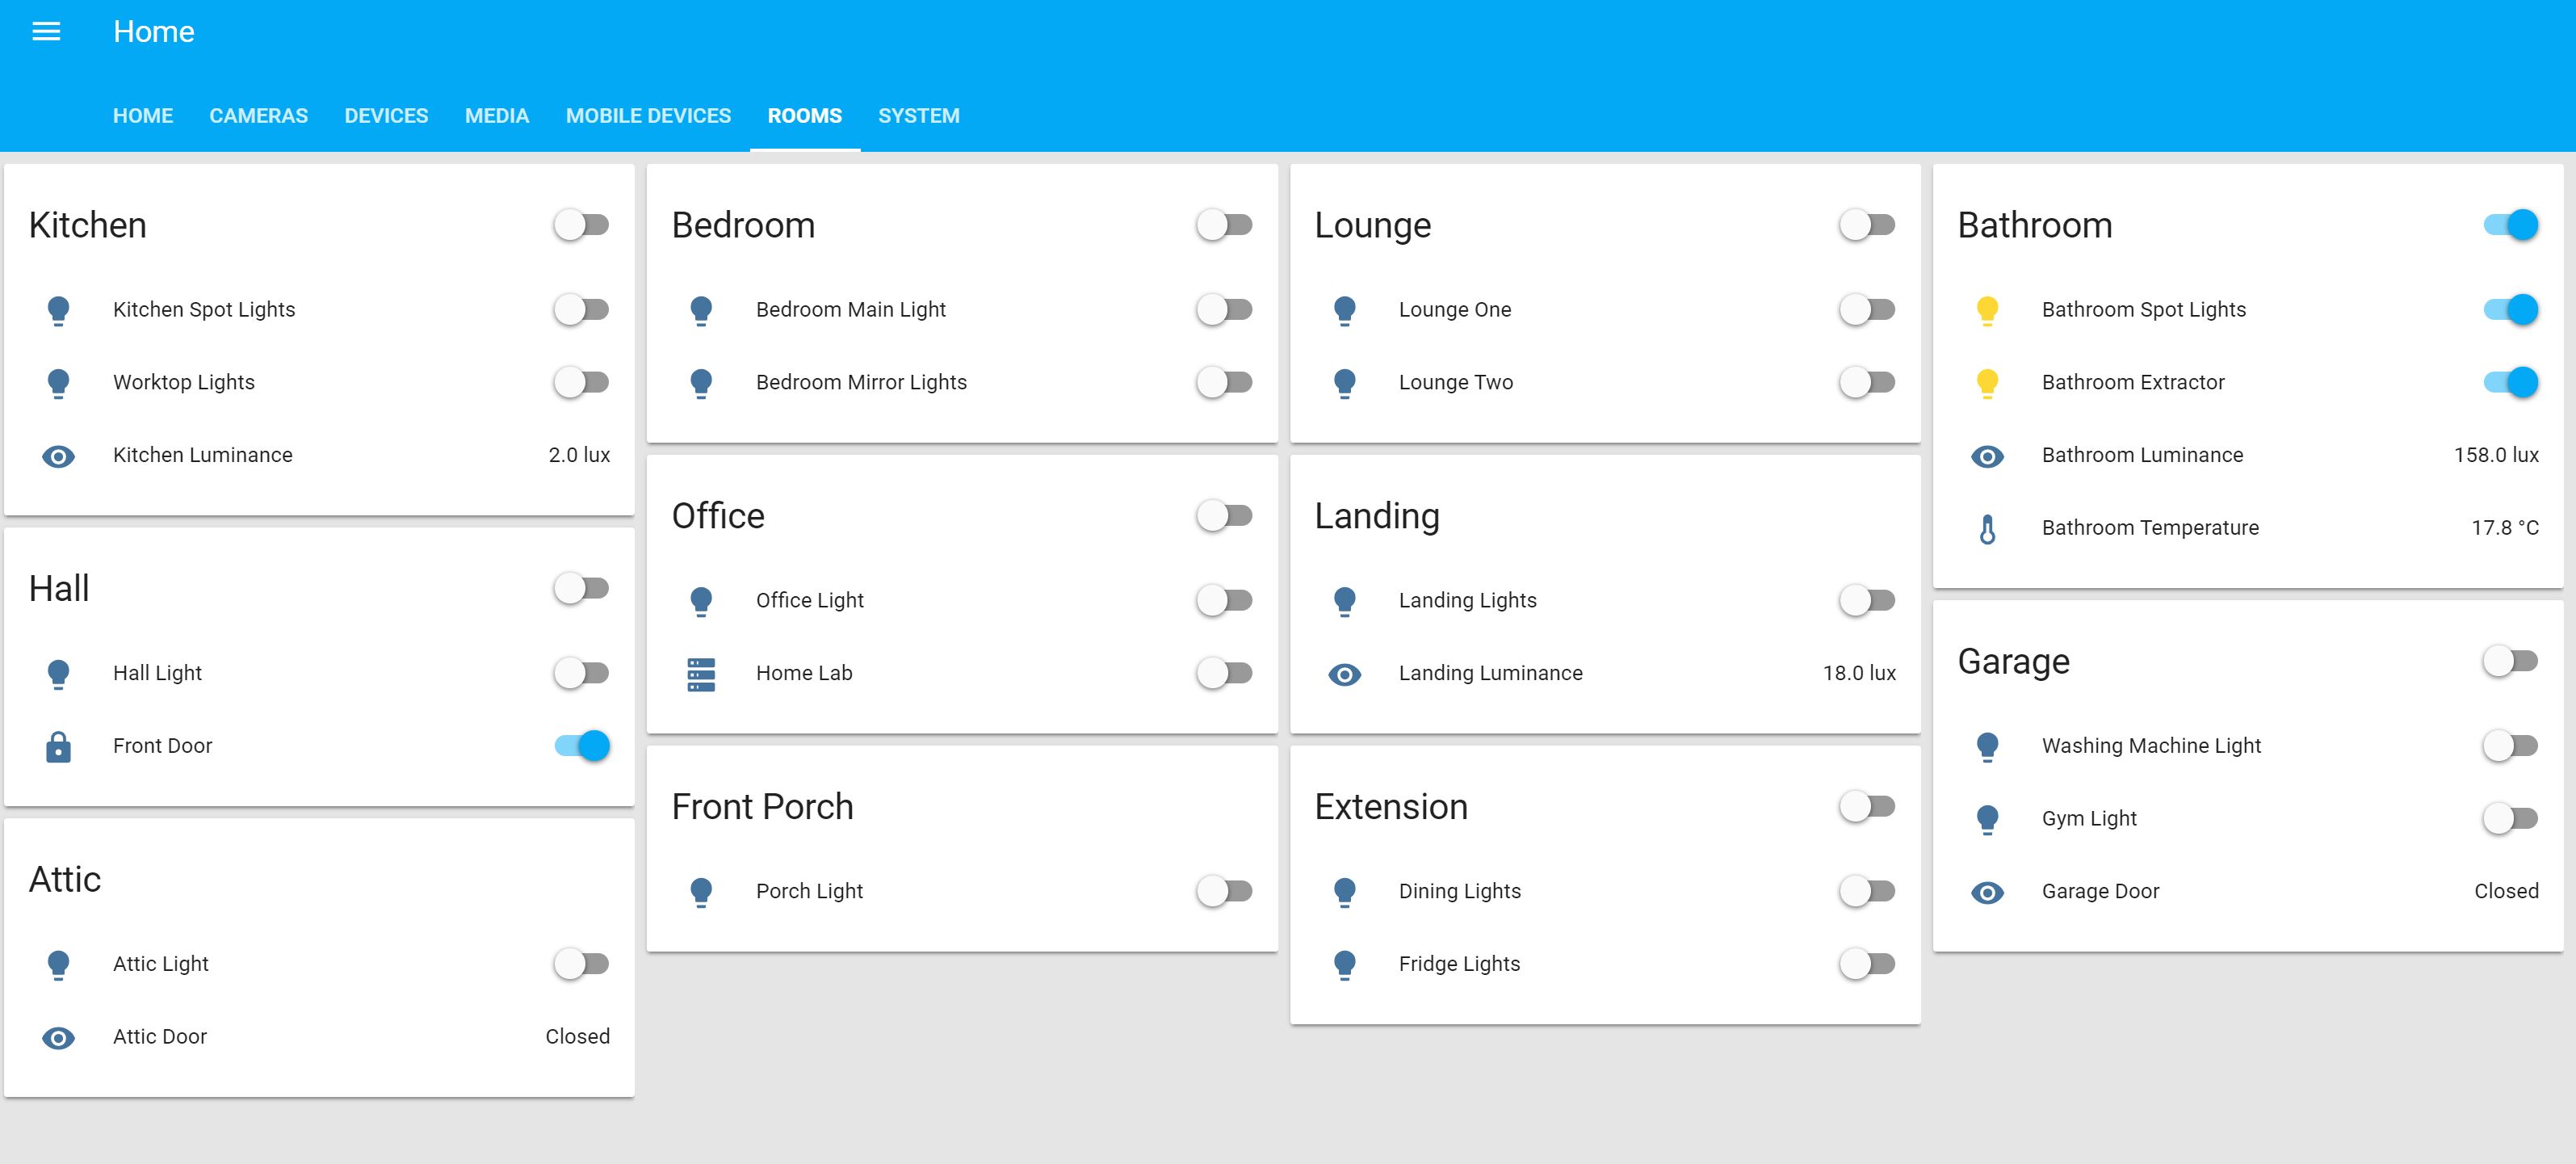
$ sudo systemctl restart home-assistant@homeassistant.service- My home with the component installed: