{{ template:title }} {{ template:badges }} {{ template:description }}
To create a new app you run the following command.
$ npm init web-config new <dir>
This command will create a project from scratch for you with sweet features as for example SCSS imports, Karma testing, live reloading, coping resources, chunking, treeshaking, Typescript, license extraction, filesize visualizer, JSON import, budgets, build progress, minifying, compression with brotli and gzip and much more.
That's it! Behind the curtains, the library web-config is used.
The below table shows how to configure the new command.
Usage: new [options] <dir>

Setup a new project from scratch.

Options:
  --dry            Runs the command without writing any files.
  --lit            Adds lit-element and various webapp related libraries to the setup.
  --no-install     Doesn't install node_modules.
  --sw             Adds a service worker to the setup.
  --src <string>   Name of the folder with the transpiled output (default: "src")
  --dist <string>  Name of the folder with the source code (default: "dist")
  -h, --help       output usage information
Below are two examples on how to use the command. The commands will both create a project in a folder called "my-project". The first one will create a simple configuration while the other will configure the project to use lit-element.
$ npm init web-config new my-project
$ npm init web-config new my-project --lit
Here's an overview of the files that are generated for you.
{{ files }}
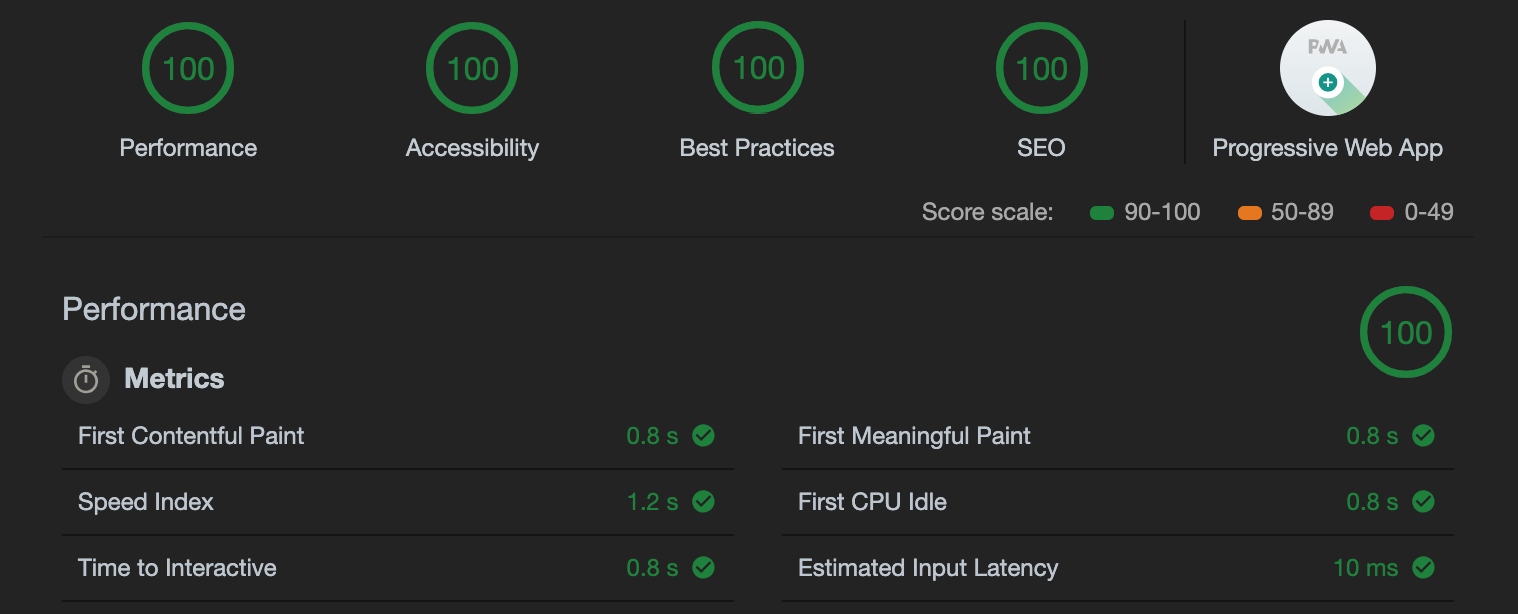
If you add a service worker by running the $ npm init web-config new my-project --sw command you'll get to enjoy a 100/100 Lighthouse score from the beginning.
You can also install the library locally and use the CLI you can run the following command.
$ npm i create-web-config
Then you would use the CLI like this.
$ web-config new my-project
{{ template:contributors }} {{ template:license }}