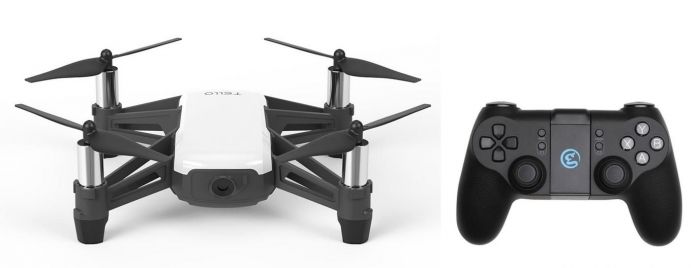
Control your Tello-Talent, Tello-EDU or Tello-Ryze with a gaming controller supported by pygame using the repository 'DJITelloPy'.
This program is primarily targeted towards new tello-users who simply want to fly their tello drone with a controller as easily and effectively as possible.
NOTE: Using a Tello Ryze with this program you will only be able to use features from the SDK 2.0. Tello Ryze users won't be able to do things such as manipulating video quality, using downward camera, etc. Adjustments to the program may be nessecary if using a Tello Ryze with the program - by simply removing specific parts of the code.
DJITelloPy repository link: https://github.com/damiafuentes/DJITelloPy
I personally switched between using a playstation dualshock 3 controller...
... and a xbox powera enhanced wired controller.
The repository contains the program itself as well as a video compiler for the video recordings you can make with the program.
Link: www.pygame.org/docs/ref/joystick.html
PRO TIP: Use the example program given in the following link to check your controller's inputs
- Have your desired gaming controller connected to your computer. Make sure your computer and pygame reads its input.
- Turn on the tello and connect to its wifi. Make sure to check the SDK version used by tello. Perhaps update it if nessecary.
- Install/Import the "DjiTelloPy" repository for use in the program. Then you may run the program.
The current button and axis alignments are:
- button 0 (X): flip backwards
- button 1 (◯): flip right
- button 2 (△): flip left
- button 3 (□): flip forward
- button 4 (L1): take photos (using cv2 and DJITelloPy command get_frame_read() )
- button 5 (R1): record a "video" - you may compile the video using the video compiler that follows (uses cv2 and DJITelloPy command get_frame_read() ). Note that using this can take up a lot of memory
- button 6 (SELECT): Emergencylands (all motors are turned off - a hard landing) if the tello is flying and reboots it if not. HOW TO MAKE A SMOOTH REBOOT: In your DjiTelloPy-repository, go to "tello.py" and edit the variable "RETRY_COUNT" to a value higher than 3. Make sure your computer automatically connects to the tellos wifi.
- button 7 (START): Takeoff (can easily be replaced with 'throwfly') if the tello is not flying and lands (slowly decreases motor speeds over time for a soft landing) if flying
- button 8 (LEFT THUMBSTICK DOWN PRESS): NO ASSIGNED FUNCTION
- button 9: (RIGHT THUMBSTICK DOWN PRESS): NO ASSIGNED FUNCTION
- axis [0,1] (LEFT THUMBSTICK): rotate left/right; fly upward/downward
- axis [2,3] (RIGHT THUMBSTICK): fly left/right; fly forward/backward
- axis [4] (L2): While pressed down, use the tello downward camera (IR-sensitive). When not pressed down, use the tello forward camera (colored)
- axis[5] (R2): NO ASSIGNED FUNCTION
NOTE: NO HAT ALIGNMENTS ARE USED IN THE PROGRAM.
FYI:
- The pygame window will show data given by the tello through the DJITelloPy command get_own_udp_object().
- The "Result" window show the contents of the get_frame_read() function in order to get the Tello POV.
- To use the a gaming controller remember to be tabbed in on the pygame window. Otherwise the Tello won't take its input.
The following settings are applied in the program:
- fps is set to 'high' = 30.'
- Resolution is set to 'high' = 720p. It can somewhat be used as a zoom-function.
- Bitrate (Mbps) is set to 'auto' = 0. Change this if you want a specific video quality.
Here you can see the program "Video_compiler.py":
import cv2
import os
import time

### Run this function to convert larger amounts of images to video ###
def image_to_video(imagefolder, videoname, fps):

    ### Select a folder which images shall be compiled to a video ###
    image_folder = f'Resources/Video/{imagefolder}'

    ### Select a name for your video - time is currently included ###
    ### NOTE: If desired, remove the section "_{time.time()}" to remove time from video name ###
    video_name = videoname

    images = [img for img in os.listdir(image_folder) if img.endswith(".jpg")]
    frame = cv2.imread(os.path.join(image_folder, images[0]))
    height, width, layers = frame.shape

    ### Explaination: cv2.videoWriter([Video location + video name], 0, [Framerate: 30], [resolution: size] ###
    ### To move video compiling location, edit {dirNameVid} and select another location of the compiled video ###
    video = cv2.VideoWriter(f'Resources/Video/{video_name}_{time.time()}.avi', 0, fps, (width, height))

    for image in images:
        video.write(cv2.imread(os.path.join(image_folder, image)))

    cv2.destroyAllWindows()
    video.release()

### EXAMPLES: ###############################################
#image_to_video(1650101797.8316865, 'Testflight', 30)       #
#image_to_video(1650722894.7688913, 'golfcourse_11', 15)    #
#image_to_video(1650723203.147218, 'golfcourse_12', 15)     #
#image_to_video(1650723223.528957, 'golfcourse_13', 15)     #
#############################################################SDK 3.0 - Tello-EDU & Tello-Talent
A quick help to understand the commands being sent to the drone would be to check this guide: https://dl.djicdn.com/downloads/RoboMaster+TT/Tello_SDK_3.0_User_Guide_en.pdf
Mission Pad an Flight Map guide: https://dl.djicdn.com/downloads/RoboMaster+TT/RoboMaster_TT_Mission_Pad_and_Flight_Map_User_Guide_en.pdf
SDK 2.0 - Tello ryze
The only commands possible with the Tello ryze can be seen here: https://dl-cdn.ryzerobotics.com/downloads/Tello/Tello%20SDK%202.0%20User%20Guide.pdf
To run any playstation controller, further requirements are needed to run the program. If you want to use a playstation 3 or 4 controller, try your luck with the following links:
A wired PS4-controller: https://www.youtube.com/watch?v=a3JaBBD2U2o
A wired PS3-controller: https://www.youtube.com/watch?v=1ZaZVvnV5D4


