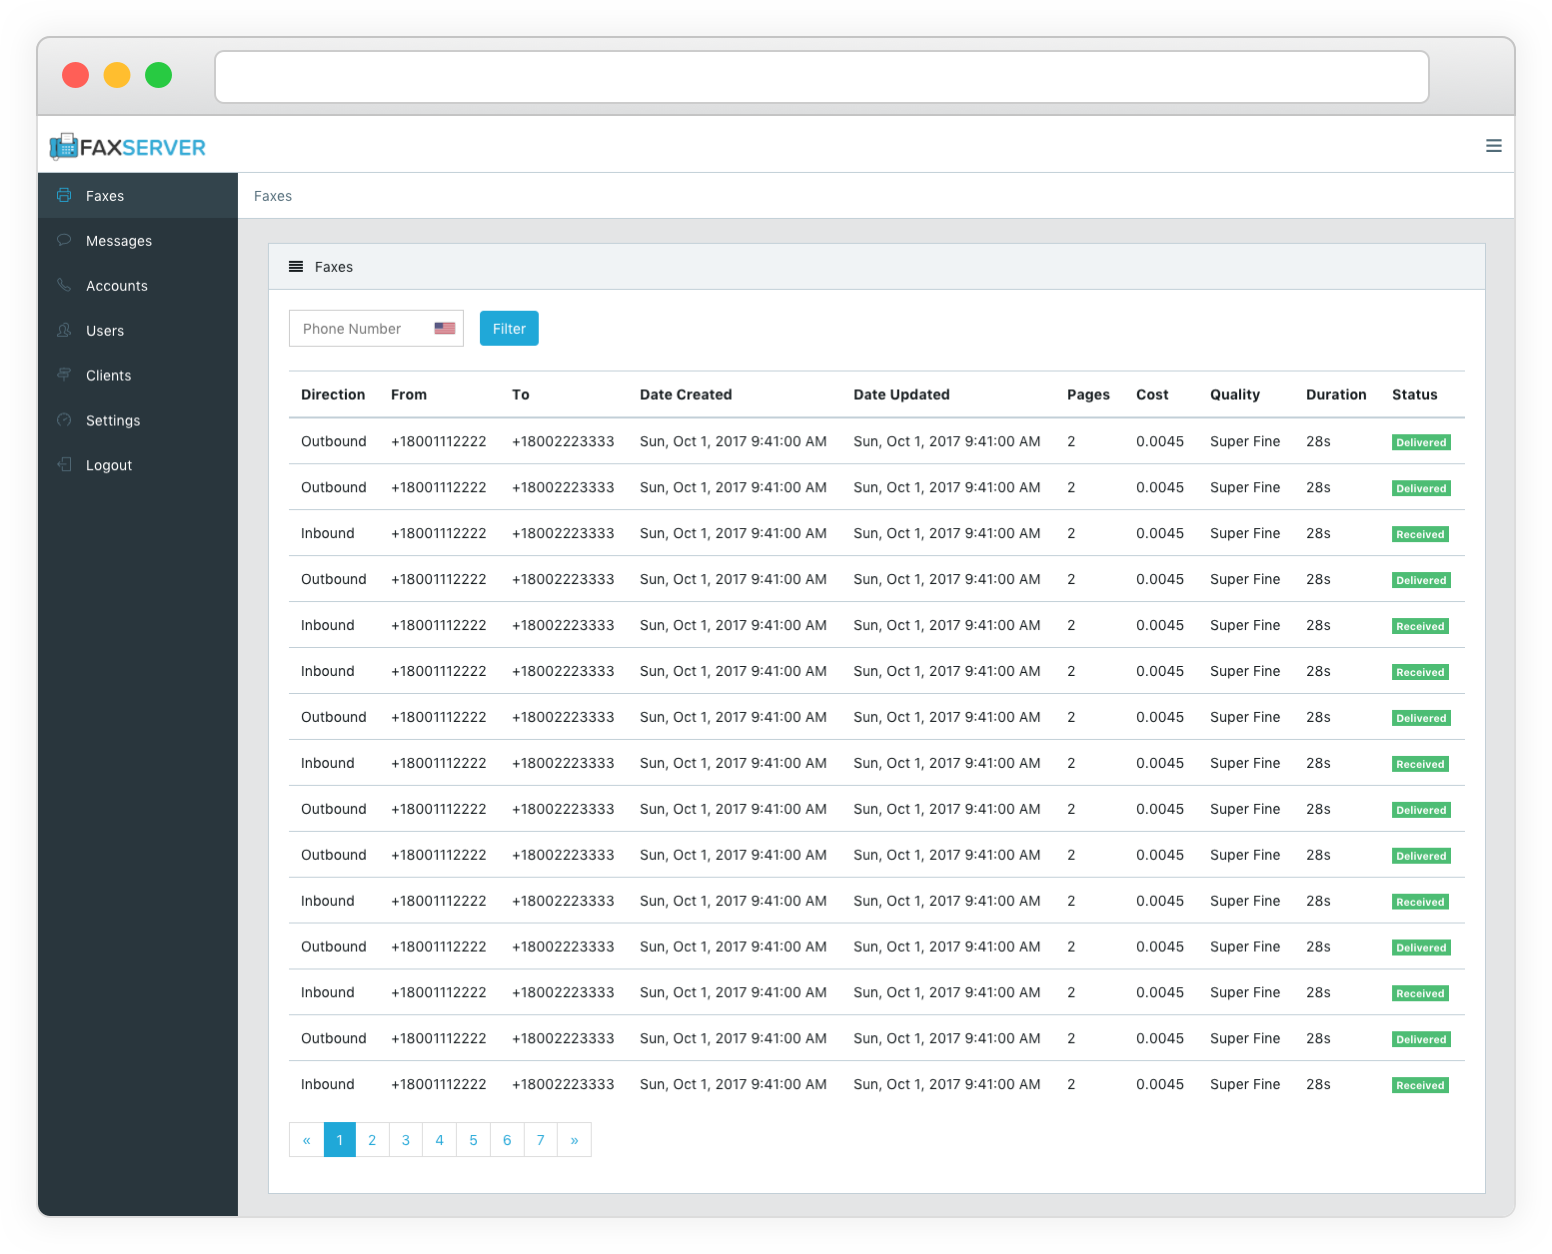
Fax Server is a server for sending and receiving faxes with the Twilio Programmable Fax API. It can also send and receive SMS/MMS messages with the Twilio SMS API as well as receive messages with the Nexmo SMS API.
The easiest way to install is with Docker
git clone --depth=1 git@github.com:bludesign/FaxServer.git
cd FaxServer
docker-compose up
After starting the server will be running at http://127.0.0.1:8080
To run the server in the background run docker-compose up -d
If it is not already installed install MongoDB if you are using authentication or a non-standard port set it with the MONGO_HOST, MONGO_PORT, MONGO_USERNAME, MONGO_PASSWORD environment variables.
Next install Vapor and Swift here for macOS or Ubuntu.
Then build and run the project:
git clone --depth=1 git@github.com:bludesign/FaxServer.git
cd FaxServer
vapor build --release
.build/release/App
The server will now be running at http://127.0.0.1:8080. Note running the server with vapor run serve will not work it must be run directly with the App in .build/release directory.
The server must be reachable from the internet which can be done using Nginx (Recommended) or Apache2.
If using Nginx the client_max_body_size must be increased to allow for larger PDF file uploads.
Example Nginx Config:
server {
    listen 80;
	client_max_body_size 20M;

    location / {
        proxy_set_header   Host $http_host;
        proxy_pass         http://127.0.0.1:8080;
        proxy_set_header Host $host;
        proxy_set_header X-Real-IP $remote_addr;
        proxy_set_header X-Forwarded-For $proxy_add_x_forwarded_for;
        proxy_pass_header Server;
        proxy_connect_timeout 3s;
        proxy_read_timeout 10s;
    }
}
First visit the Fax Server's address and register a new user account after you create your account you should disable user registration in settings.
- Open the Manage Active Numbers page on Twilio.
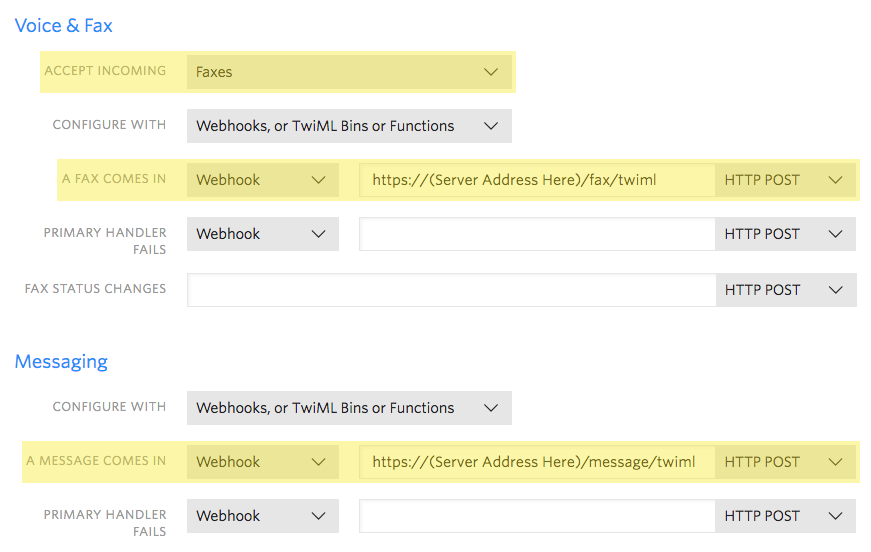
- For each number you will be using configure Twilio to forward faxes and if you want SMS then messages to your server.
- Use
https://(Server Address Here)/fax/twimlandhttps://(Server Address Here)/message/twimlfor the webhooks. - Visit the Twilio Account page to get your Account SID and Auth Token.
SMS messages can only be received from Nexmo so no accounts need to be added in Fax Server to receive messages.
- In your Nexmo account settings under API settings make sure the HTTP method is set to POST.
- Under Numbers in Nexmo set the SMS webhook URL to
https://(Server Address Here)/message/nexmo - Nexmo must be enabled in Fax Server settings if it has been disabled.
- Login to Fax Server and click on Accounts.
- Create an account for each phone number you will be using for faxing or SMS messaging using the Twilio phone number, account SID and Auth Token from above.
- If you have multiple phone numbers for the same Twilio account create separate accounts in Fax Server for each phone number using the same Account SID and Auth Token for each.
- For email notifications setup an account with Mailgun and set the email addresses, Mailgun API Key and Mailgun API URL in Fax Server Settings.
It is possible to add phone numbers to Fax Server that are not in your Twilio account but have been verified this can be used to add a number such as a regular fax machine allowing you to send faxes from Fax Server and still receive them on a regular fax machine. Note this does not apply to SMS messages, SMS messages can only be sent from Twilio numbers they can not be sent from Twilio verified numbers.
- [Must Be Done] Disable user registration in Fax Server settings after setting up your user account so that new users can not be created. Note you can always create new users in the Users section this only disables anonymous user creation.
- [Strongly Recommended] Setup HTTPS on the proxy server (Nginx or Apache2) see tutorial here.
- [Advanced Users] Enabled secure (HTTPS Only) cookies in settings. This should only be done if you only access your server over a HTTPS connection and will restrict logins to HTTPS only. Note if you enable this you will not be able to sign in over an insecure (HTTP) connection to turn if off.
- [Advanced Users] Enable 2 factor authentication (TOTP) login, under Users select your user account and activate 2 factor authentication. Note there is no way to reset this if you loose your TOTP secret key.
- [Advanced Users] If you will not be receiving Nexmo SMS messages the webhook can be disabled in Fax Server settings.
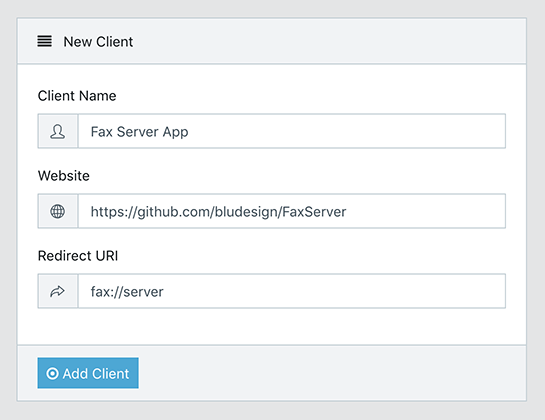
- Open Clients in Fax Server and create a client with the above values.
- After creating the client copy the Client ID and Client Secret and fill them into the iOS app along with your servers URL.


