
Click the image below to view a video of the Dynamic Name Tag!
“The Dynamic Name Tag” is a device that shares more than just your name with the people you are with. You can share your interests, achievements, hobbies, contact information, even the current date and time. Your creativity is the limit of what you can do!
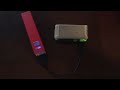
The name tag is a Raspberry Pi Zero W equipped with with a 2 inch PaPiRus ink display and is powered by an ordinary phone charger.
This is a fun DIY project that will turn heads at your next job fair and expose you to programming with single board computers such as Raspberry Pis.
- Raspberry Pi Zero W Budget Pack
- PaPiRus 2 inch ink display
- Solder and Wire (Used to attach GPIO pins) or purchase hammer in GPIO pins
- Velcrow stick strips used to attach name tag to your shirt or jacket
- Portable USB charger
- Mouse, Keyboard, and Monitor (for programming)
- Install flash image of either Raspbian Jessie or Jessie Lite to your SD card.
- Configure your pi: keyboard, locale, time, wifi, enable SPI and I2C interfaces.
- In the terminal update your Raspberry Pi with the following commands:
# Update and Upgrade $ apt-get update $ apt-get upgrade # Restart $ sudo shutdown -r now - Install PaPiRus
# When prompted select 2" screen $ curl -sSL https://pisupp.ly/papiruscode | sudo bash # After installation your pi will restart - Test that the display is workin properly
$ papirus-test
This is your chance to be creative! Using whatever paint-type program you have in mind create your own name badge. Before you start there are some things to keep in mind! The dimentions of the papirus screen is 200x96 pixels, so before you start creating you display set your canvas to those dimentions. The ink display shows only two colors: white and black.
Here are the name badge displays that I created on my mac using PaintBrush, a free microsoft paint like software.
In order to have a consistent display I created a base image first, then I created duplicates of that base image and added the desired information for each display. I also used this image for displaying system information such as date and time.


-
Log into github and create a project repository.
-
Name the project whatever you like and initialize the repository with a read me.
-
Upload your display images to the repository.
-
Create a new file called
nametag.pycopy and past code below into file and commit change.#!/usr/bin/python import time import sys import os import smbus import RPi.GPIO as GPIO import datetime import Image import ImageDraw import ImageFont from papirus import Papirus from papirus import PapirusImage from papirus import PapirusComposite # Set Screen rotation # Optional rotation argument: rot = 0, 90, 180 or 270 image = PapirusImage(180) # Loops through displays infinitely while True: # 1 Original Screen Major / Minor / Graduation displays for 15 seconds # Write image to the epaper screen image.write('full-path-of-your-file') # Wait / display for 15 seconds time.sleep(15) #time.sleep(3) # For Dev so you don't have to wait as long # 2 Display Hobbies and Interests 15 seconds # Write image to the epaper screen image.write('path-of-your-file') # Wait / display for 10 seconds time.sleep(10) #time.sleep(3) # For Dev so you don't have to wait as long # 3 Display Time and Date 10 seconds # Calling PapirusComposite this way will mean nothing is written to the screen until WriteAll is called textNImg = PapirusComposite(False, 180) # String storing time and data into respective strings t = datetime.datetime.now() timeString = t.strftime("%I:%M %p") dateString = t.strftime("%a %b %d") # Add image with default layout date text and time text textNImg.AddImg("path-of-your-file", 0, 0, (200, 96), Id="NameLogo") textNImg.AddText(dateString, 65, 20, Id="date") textNImg.AddText(timeString, 65, 40, Id="time") # Now display all elements on the scrren textNImg.WriteAll() time.sleep(10) #time.sleep(3) # For Dev so you don't have to wait as long -
Pull reposity onto you Raspberry Pi
-
Set the path for your display images in
nametag.py -
Navigate to project directory and give executable permissions to your python script
$ cd your-repository-location
$ chmod +x nametag.py
- To run your python script use the command
$ python nametag.py - In order for the nametag program to run at start up open
/etc/local.rcwith your prefered text-editor and add the command$ python /full-path-to/nametag.py &to the file. Because our script runs continuosly we add the&to run the program in the background