02 SENSORS RS485 IO MIC
Run this to get temperature in C°:
cd /sys/class/hwmon/hwmon0
cat temp1_input
Displayed temperature must be divided by 1000.
cd /sys/bus/i2c/devices/2-0050
echo -ne "a" > eeprom #write single byte
cat eeprom # read full eeprom
Last 48bit of eeprom represent an unique EUID.
cd /sys/bus/iio/devices/iio\:device0
cat in_voltage0_raw #read adc value
grep "" * #read all
while sleep 0.2 ; do cat in_voltage0_raw ; done #read values in loop
| Linux | Connector |
|---|---|
| ADC0 | AN0 |
| ADC1 | BATTERY MONITOR |
| ADC2 | NTC2 |
| ADC3 | NTC1 |
| ADC4 | AN_LED |
| ADC5 | AN_AC |
cd /sys/class/gpio
ls
To read the gpios, run:
cd /sys/class/gpio
echo 128 > export
echo 129 > export
echo 130 > export
echo 131> export
| IN0 | 128 |
|---|---|
| IN1 | 129 |
| IN2 | 130 |
| IN3 | 131 |
then you can do:
cd gpio129
cat value #read input value
cd /sys/class/pwm/pwmchip0
echo 0 > export
echo 2 > export
cd pwm0
echo 1000000 > period #Setting 1Khz
echo 500000 > duty_cycle # 50% Duty cycle
echo 0 > duty_cycle # 100% Duty cycle
echo 1000000 > duty_cycle # 0% Duty cycle
echo 1 > enable
| Linux | Schematic |
|---|---|
| pwm2 | OUT1 |
| pwm0 | OUT2 |
If you have some issue and not see any output, try toggling che enable file.
echo 0 > enable
echo 1 > enable
Serial is on /dev/ttyAMA4 or ttySAC4
Install screen:
apt-get update; apt-get install -y screen
Run:
screen /dev/ttyAMA4
or
echo "hello" > /dev/ttySAC4 #test only send
Only doing 'cat' is not enough if you did not configure the serial.
Pressing home key is the same as pressing a keyboard button.
cat /dev/input/event0
LSM6DSL is an accellerometer and gyroscope sensor, you will see 2 diffrent devices for each functionality (accel and gyro).
cd iio:device1

cat name #lsm6dsl_accel is returned

cat sampling_frequency_available #list supported sample rate

echo 26 > sampling_frequency #configure 26hz as sample rate

cat in_accel_x_raw #read x axes accelleromer value
For a real application you may require a raw flow of data with low overhead, in that case we will need to use the buffer:
# Enable channels we want to retrieve
echo 1 > scan_elements/in_accel_x_en
echo 1 > scan_elements/in_accel_y_en
echo 1 > scan_elements/in_accel_z_en
echo 1 > scan_elements/in_timestamp_en #nanoseconds timestamp

# Enable buffer
echo 1 > buffer/enable
Now you can read the values from /dev/iio:device2
The format of the data is described in scan_elements/<channel>_type.
To try it out:
dnf install kernel-tools

iio_generic_buffer --device-num 2 -g -c 10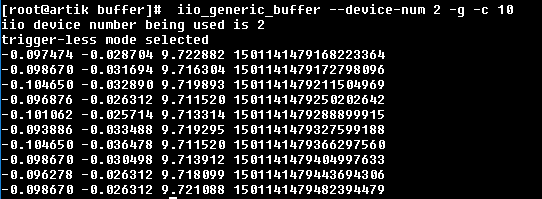
To handle high sample rate you will also require to modify /buffer/length and /buffer/watermark according to your requirements.
# Disable buffer
echo 0 > buffer/enableThe drivers embeds also event capabilities (tap, double tap, freefall, pedometer, tilt, wakeup).
On the device folder you can see diffrent events to enable.
Each event may require different sample rate to work correctly:
| Event | Sample rate |
|---|---|
| Tap | 416 |
| Double tap | 416 |
| Freefall | 416 |
| Wakeup | 416 |
| Tilt | 26 |
| Pedometer | 26 |
#Enable tilt
echo 1 > event_tilt_en
Now rotate the board at 180°
#Pop event buffer
cat event_pop_buffer_dbg #should print tilt,0,<timestamp>
To keep reading events you need to read this virtual file at a fixed rate (like 100ms). If a new event is detect you will receive a string with this format:
<event>,<extra data>,<timestamp>
event can be tap, dtap, step, tilt, freefall, wakeup
extra_data contains only the number of steps performed in case of a step event.
If no event was detected the file reading will throw a -EAGAIN (-11) error.
Actually the I/O standard has a different way to throw events then the one used by this driver, so you won't receive anything on IIO_GET_EVENT_FD_IOCTL. For different reasons we had to do it in another way, but we are working on a solution to align it to the standard.
Works like the accelerometer but it should be on iio:device2
To record audio you can run:
arecord -Dmic -r 44000 -f S32_LE prova.wav
The 'mic' plug binds internal filter to audio recording, since the hw codec does not handle high pass filter and amplification, we need to do it at software level with alsa.
You can check the configuration by reading /etc/asound.conf
Note: If you are running the command for the first time on release v1.0, you may need to start a short dummy recording and then increase the volume with alsamixer command up to 75%, then you can run the above command without issues.